Collection Routine Specimens
Collection Routine Specimens
Collection Routine Specimens for Laboratory Investigations
Collection Routine Specimens for Laboratory Investigations
· SOPs (Standard Operating Procedures)
o Is the established method for performing laboratory procedures and aim to standardise procedures in the laboratory technical work
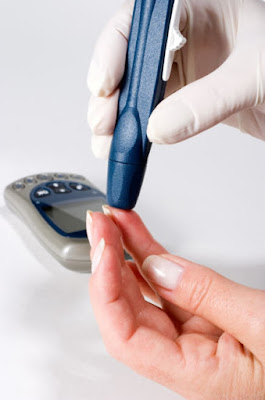
· Finger prick specimen
o Is a Capillary blood collected from a pierced finger
· Venous blood sample
o Blood collected from a vein
Materials Used for Collecting Venous Blood and Finger Prick
Common materials for both venous blood collection and finger prick
· Sterile swab
- Used for cleaning the skin
· 70% alcohol
- Used for disinfecting the skin
· Gloves
- Used to protect the phlebotomist from contamination
· Disposal bucket
o Used for disposing used materials
· Sharps box or container
o Used for disposing sharp materials
Specific materials for finger prick
· Lancet
- Is used for piercing of the skin
· Specific materials for venous blood collection
o Syringes (2.5ml, 5ml and 10ml) and needles 19G, 21G and 23G)
§ For drawing blood
o Vacuum (needle, holder and tubes)
§ For drawing blood
o Blood containers
§ For putting blood
o Tourniquet
§ For dilating veins
Procedure of Finger Prick
· Purpose of finger prick blood collection
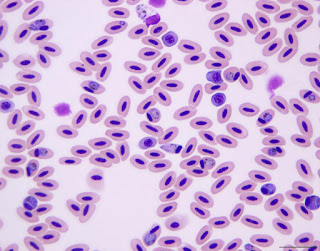
o Is to obtain capillary blood which is may be used for haematological examinations, including haemoglobin estimation, total and differential white blood cell counts and blood cell morphology, detection of blood parasites, and sickle-cell screening.
· Procedure for Finger Prick
- Wear gloves
- Clean the puncture area with a cotton wool swab soaked in 70% methanol or an alcohol swab; allow area to dry
- Using a sterile lancet, make a rapid puncture using the side of the finger in adults and children sufficiently deep to allow the free flow of blood avoid the tip of the finger
- Wipe away the first drop of blood with a piece of dry cotton wool. Use the next few drops and transfer onto clean glass slides or into a capillary tube or pipette.
- When sufficient blood has been collected, press the piece of dry cotton wool firmly on the puncture area until the bleeding stops.
- Place used lancet in the sharps box or container marked “SHARPS”. Place the materials for wrapping the lancet and the cotton wool in the bucket marked “INCINERATOR”.
- Make sure the site is warm to ensure blood flows freely.
- Do not squeeze the finger too hard as this will lead to haemodilution from tissue fluid and may give unreliable results.
- On cold days, sock the hand (or foot of an infant) in warm water and dry before collecting the sample.
Procedure of Venous Blood Collection
· Purpose of venous blood collection
- Venous blood is used for all blood examinations, including haematological, parasitological, biochemical and serological tests, and for blood culture. Blood samples are collected into plain tubes or tubes containing anticoagulant, or into blood bottles, as required.
· Safety Precautions during Collection of Blood Sample from Patients
- Always follow standard safety precautions when drawing blood
§ Consider every person (patient or staff) as potentially infectious and susceptible to infection
§ Wash hands before and after taking a sample from each patient
§ Put on new gloves before collecting blood
§ If blood is spilled, mop and disinfect area immediately
§ Keep work area organized, clean, and disinfected
§ Discard all used items in appropriate containers
· Overview of Vein Anatomy (Location of veins)
- Superficial Veins of the upper limb
§ Median Cubital Vein. A superficial vein, most commonly used for venepuncture. It lies over the cubital fossa and serves as an anastomosis between the cephalic and basilic vein
§ Cephalic vein.Shown in both the forearm and arm, it can be followed where it empties into the axillary vein
§ Basilic Vein. Seen in the forearm and arm, it dives to join the brachial; best area for venepuncture is antecubital fossa area
Procedure for collecting venous blood
· Apply tourniquet to increase pressure in the veins and aid in site selection. Ask the patient to make a tight fist, so the veins become more prominent.
· Note that the tourniquet is applied 7.5 – 10 cm above the intended site
· The tourniquet should not be left on for longer than ONE minute
· Using the index finger, feel for a suitable vein, selecting a sufficiently large vein that does not roll and with a direction that can be felt.
· Wearing gloves clean the site with a cotton swab soaked in 70% methanol or an alcohol swab and allow to air dry. Do not retouch the cleaned area.
· Screw the needle into the handle
· With the thumb of the left hand holding down the skin below the puncture site, insert the needle along the line of the vein with the bevel of the needle facing directly upwards.
· Insert needle at a 15 to 30 degree angle using a quick smooth motion.
· Push the tube on to the end of the needle which is located in the handle.
· When sufficient blood has been collected, release the tourniquet and instruct the patient to open his or her fist. Remove the needle from the vein and press firmly on the venipuncture site with a piece of dry cotton. Remove the tourniquet and instruct the patient to continue pressing on the puncture site with the arm raised until bleeding stops.
· Label the tubes
· Check to ensure bleeding from the venipuncture site has stopped. Cover the area with a small dressing, if needed.
· Place the needle in the sharps box. Place other contaminated materials in the bucket marked “INCINERATION”.


It's nice ,I like it so much
ReplyDelete